
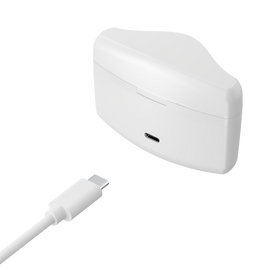


How to Replace Common Hearing Aid Parts at Home
Posted by DR Paul on Jul 10, 2023

Hearing aids are incredibly valuable devices that help individuals with hearing impairments communicate and engage with the world around them. However, hearing aids can experience wear and tear over time. This wear and tear can require parts to be replaced regularly. While hearing aid repair shops and audiologists can be a helpful resource for these replacement parts, it is also possible to replace common hearing aid parts at home. In this blog, we will discuss how to replace common hearing aid parts at home, including when you can do it yourself, what tools you need for the job, and the steps you need to take.
Before replacing any hearing aid part:
It is crucial to know when to do it yourself and when to go to a professional. Some hearing aid parts require specialized knowledge and tools that you may not have at home. Tools and parts are available at Hear-Better.Com. Therefore, it is always prudent to consult your audiologist when you experience any issues with your hearing aid. If they think the problem can be fixed at home, they will guide you through the process. Once you have the green light, you may proceed to replace the hearing aid part yourself.
The tools required to replace common hearing aid parts are quite basic:
You may need a hearing aid cleaning brush, wax pick, ear wax removal drops, small screwdrivers, and battery testers (Hear-Better.Com). You can find these tools at a hearing aid store or online. Keep these tools organized in a small container so that they’re handy whenever you need them.
Common Hearing Aid Parts:
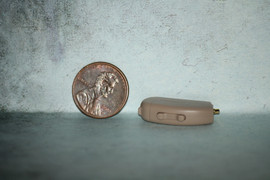
When it comes to replacing hearing aid parts, the first element that needs careful attention is the battery. Batteries often require replacing every two weeks to a month, depending on the model of your hearing aid. Always have spare batteries in store to ensure your hearing aid doesn't fail you unexpectedly. Dealing with hearing aid batteries is easy. Open the compartment, remove the used battery, and insert the new one. Ensure the positive side of the battery faces the positive direction in the hearing aid.
Other vital hearing aid parts:
Other hearing aid parts that require replacement are tubing or tubing connections, ear tips, wax filters, and cleaning brushes. Tubing or tube connections can break or tear due to age and regular use. Ear tips, wax filters, and cleaning brushes require replacement every few months to maintain optimal hearing capabilities. Replacing these parts is straightforward; follow the manufacturer's instructions for replacement, using the tools we previously mentioned.
Hearing Aid Maintenance:
Finally, remember that a maintenance schedule for your hearing aid is crucial. Regular cleaning and maintenance can extend the life of your hearing aid and keep it functioning properly. A cleaning and maintenance schedule establishes a good routine for caring for your hearing aid. Create a schedule that works for you and ensures your hearing device receives a proper check-up every few months.
Conclusion:
As an active hearing aid user, you must know how to maintain and replace common parts at home. Familiarize yourself with your device, consult with your audiologist before proceeding, and obtain the necessary tools for the job. Remember, when replacing parts, always follow the manufacturer's instructions carefully. With these tips, you can maintain your hearing aid's optimal performance and avoid costly repairs. Your device will last a lot longer if you keep it in good condition. If you have any questions or would like to schedule an appointment, contact your audiologist.